








On this page
Since March 2024, Google requires Consent Mode v2 for any site serving ads to visitors in the EEA. Without it, remarketing audiences stop building and conversion data from those visitors degrades — not as a penalty, but because Google stops accepting signals it cannot tie to a consent state.
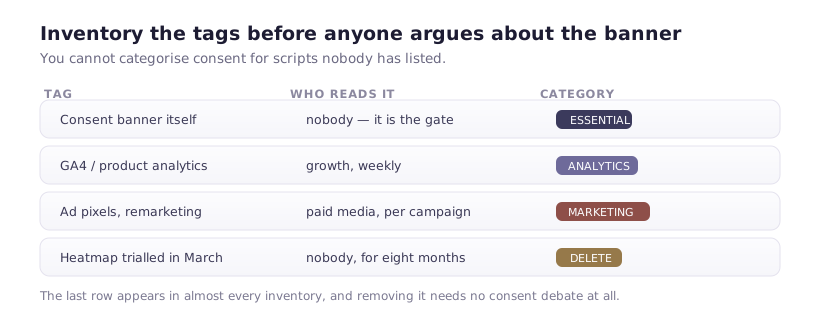
Most guidance on this stops at the concept. If you want the strategic framing — which tags to inventory, how to brief a client, what to hand over — we wrote the Consent Mode checklist for agencies for exactly that. This article is the other half: what you click.
What Consent Mode is, in one paragraph
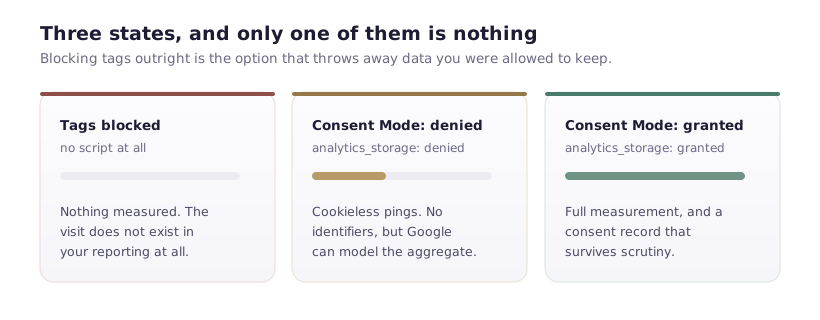
Rather than blocking Google tags outright, Consent Mode lets them load in a restricted state. They send no identifiers and set no cookies, but they do send a signal saying "a visitor was here and did not consent". Google uses those signals for modelled conversions. The practical effect is that a declining visitor is still partially measurable in aggregate, without anything being stored on their device.
The two parameters that matter most are analytics_storage and ad_storage. v2 adds ad_user_data and ad_personalization, which is the change that made it mandatory for advertisers.
Order of operations
This is where implementations go wrong. The sequence is not negotiable:
- Default consent state is set to denied
- Google Tag Manager loads
- The consent banner loads and reads any stored decision
- If a decision exists, an update is sent
- Tags fire, or do not, according to that state
If the default arrives after GTM, tags may fire in a granted state for a fraction of a second. That is the bug this ordering exists to prevent.
Step 1: the default, in Webflow's head code
The default must run before GTM. In Webflow, that means it goes at the very top of Project settings → Custom code → Head code, above the GTM snippet.
<script>
  window.dataLayer = window.dataLayer || [];
  function gtag(){ dataLayer.push(arguments); }

  // Denied until a visitor says otherwise. This must execute before GTM loads.
  gtag('consent', 'default', {
    ad_storage: 'denied',
    ad_user_data: 'denied',
    ad_personalization: 'denied',
    analytics_storage: 'denied',
    functionality_storage: 'granted',
    security_storage: 'granted',
    wait_for_update: 500
  });
</script>
functionality_storage and security_storage are granted because they cover strictly necessary behaviour — session handling, fraud prevention — which does not require consent.
wait_for_update tells Google's tags to pause briefly for an update signal before acting on the default. 500ms is the usual value; raise it if your banner initialises slowly, and measure rather than guess.
Step 2: GTM immediately after
The standard GTM container snippet goes directly below. Nothing between them.
If you are using a consent app that manages Google tags for you, this step may be unnecessary — check whether it injects gtag itself before adding a second copy. Two copies of the Google tag is a common and confusing failure.
Step 3: enable consent in GTM
In your GTM container, open Admin → Container Settings and enable Consent Overview. This adds a shield icon to the tag list and unlocks per-tag consent settings.
Then, for each tag, open it, go to Advanced Settings → Consent Settings, and set the required consent type:
| Tag | Required consent |
|---|---|
| GA4 configuration and events | analytics_storage |
| Google Ads conversion and remarketing | ad_storage, ad_user_data, ad_personalization |
| Meta, LinkedIn, TikTok pixels | ad_storage (set as additional consent) |
| Strictly necessary tags | none |
Google's own tags understand these natively. Third-party pixels do not, which is why they need the requirement declared explicitly — GTM then withholds them.
Step 4: the update signal
When a visitor makes a choice, an update has to be sent. A consent app that supports Consent Mode does this for you; verify rather than assume. Otherwise it looks like this:
<script>
  // Fired by your banner when a visitor grants the analytics category.
  gtag('consent', 'update', {
    analytics_storage: 'granted',
    ad_storage: 'granted',
    ad_user_data: 'granted',
    ad_personalization: 'granted'
  });
</script>
Send only what was actually granted. Sending everything on a partial acceptance defeats the point and is exactly what an audit would look for.
Step 5: verify in Preview mode
GTM's Preview is the best verification tool available, because it names the rule that blocked a tag.
Connect Preview to your site in a private window. Before touching the banner, tags requiring consent should appear under Tags Not Fired, with the consent condition given as the reason. Accept, and they move to Tags Fired. Anything sitting in Tags Fired before you clicked is misconfigured, and Preview tells you which condition was missing.
Also check the Consent tab in Preview, which shows the current state of all six parameters at each step. Watching analytics_storage flip from denied to granted at the moment you click Accept is the clearest confirmation there is.
Common mistakes
Default after GTM. The single most frequent error. Head code order matters and is easy to disturb when someone adds another snippet later.
Assuming your CMP handles it. Many do. Some only handle Google's own tags and leave third-party pixels ungated. Verify in Preview.
Granting everything on "Accept all" without categories. If your banner has no category granularity, you cannot honour a partial choice, and Consent Mode's value is largely lost.
Never testing the decline path. Almost everyone tests Accept. The path that matters legally is Decline, and it is the one that is usually broken.